How to Add Baby Face to Digital Background
Helpful tips to create your digital backdrop composite newborn portrait!!
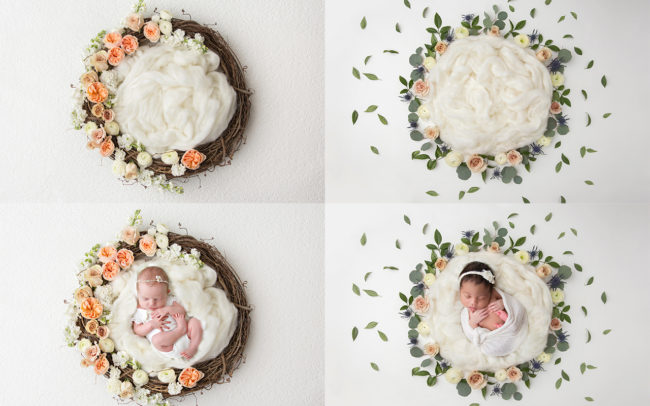
- PLAN THE NEWBORN DIGITAL COMPOSITE AHEAD OF Time
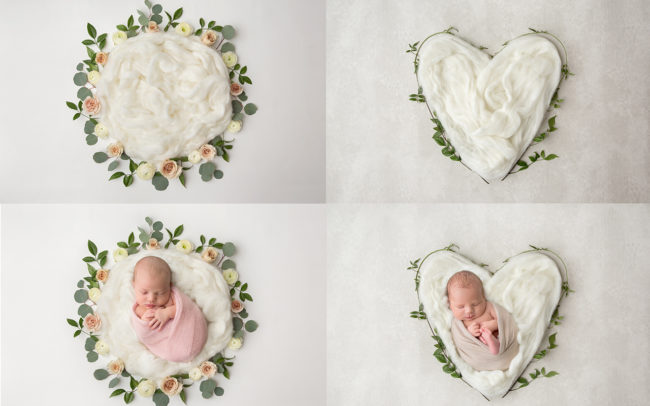
This will be the most helpful step in your creation process! Retrieve ahead to the digital properties you will be using and program the layer you will photo baby on.
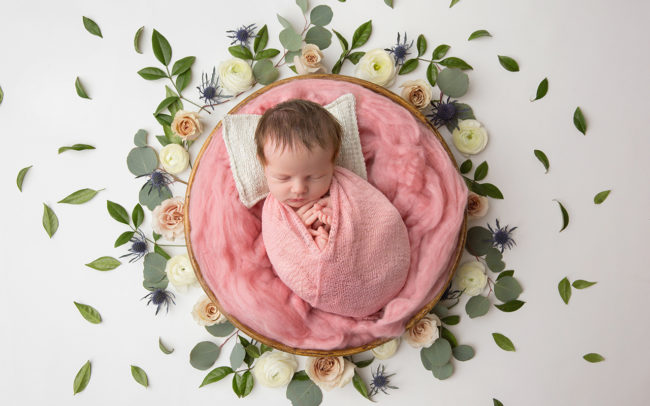
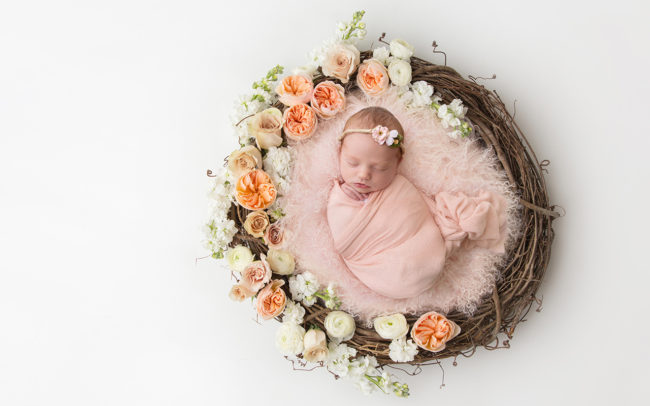
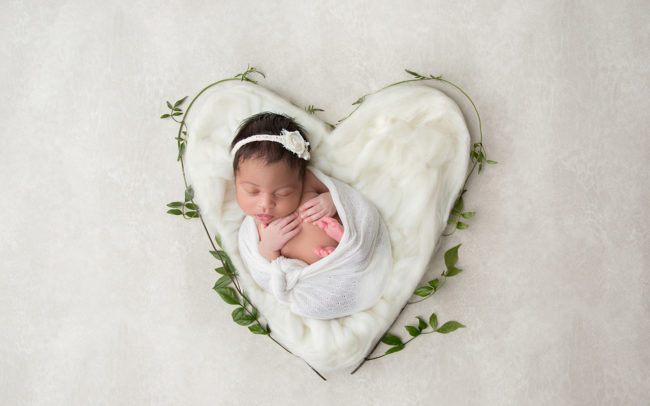
If the newborn digital backdrop has a white/cream fluff layer use a similar color or light colour in your original epitome. If the digital background uses a shade of pinkish or blueish, effort your best to use a fluff or layer that is similar. Try to use a similar texture of fluff where you can. Make sure that fluff surrounds all parts of baby (peculiarly the head, arms, easily & anxiety-these are difficult areas to Photoshop around afterwards). Planning the digital newborn background composite ahead will aid salvage you lot fourth dimension in the editing process.
The near realistic newborn digital backdrop composites are created when you are transferring not just the baby from the original epitome, but as well the layer he/she is on & retaining the original shadows. The only pace you will need to practise at that point is to blend the layers together.
-
LIGHTING THAT COMPLIMENTS THE NEWBORN DIGITAL BACKDROP
Lite direction is everything!! Being able to replicate a similar lighting situation will greatly ameliorate the "believability" of the composite image.
All of my newborn properties composites are created using studio light only can work for newborn photographers who shoot with natural or studio lighting. Just pay attention to how the shadows fall on babe and look at how they fall on the digital background. I always shoot with my light from the left of camera and thus the shadows fall slightly to the right. I ofttimes use a white or argent reflector on the correct to fill in any harsh shadows. You tin can do the same when shooting for these newborn babe digital backgrounds and backdrops. Replicating lighting leads to more believable composites.

-
POSITIONING Babe TO SUITE THE NEWBORN DIGITAL BACKGROUND
For nests, bowls and baskets you are best photographing babe from directly higher up. Always keep in mind the angle of the infant to the light source (45 to 90 degrees) and recall of how they volition fit into the newborn digital background composite you are looking to achieve at shooting stage. I find that photographing baby in a wrap & positioned diagonal to the lighting works well.
-
WRAPPING Infant TO FIT THE NEWBORN DIGITAL BACKDROP
If wrapping baby, try to keep the wrap close to baby. A flowing wrap is non impossible to make realistic looking only will certainly increase your edit time in post product. A simple wrap works well. The more snuggled baby is (feet not as well far from the face), the more seamlessly he/she volition fit into the composite. There are many gratuitous tutorials on newborn wrapping for babe posing that y'all can discover on YouTube.
-
CLOSE Downward YOUR Aperture A Piddling
I normally photograph my newborns between F2.8 or F3.two for normal set-ups. For digital backdrops, ideally photograph baby at an aperture effectually F4. This is the aperture that the images were created at and will give the most realistic looking final composite image. It is best for all parts of baby to not be blurry. Y'all don't demand to achieve a lot of bokeh when shooting for digitals. Just conform the settings when shooting for the digital you lot have in mind & than move back to your original settings when photographing the balance of your newborn infant session.
-
POST PROCESSING OF YOUR NEWBORN DIGITAL BACKDROP COMPOSITE PORTRAIT
Everyone photographs (and edits) in a slightly different temperature depending on their own preferences (warm vs cool). It is helpful to wait at the digital properties you will be using and assess the overall color temperature you would like to achieve. I unremarkably edit the baby photo (skin & make clean ups) I will be using first; that way when I composite into the digital properties the simply remaining work is to adjust the tones to match the backdrop and blend the layers together. Lastly, you tin can arrange the whole image to your color preference & add any finishers to your paradigm to ensure your "look" is achieved. I love seeing the creativity each of you use for these images, the goal is to accept fun!!
-
HELPFUL EDIT GUIDELINES – The basic steps to create a composite newborn digital portrait
~E'er support & relieve your digital download in two places. But like your client images, you don't want to have to replace these!~
This is but one method (of many!!) to create your composite image, merely the method I find well-nigh simple. You cull any method that you are nearly comfy with!
- Open your digital backdrop & your baby paradigm in Photoshop
- In your baby image, take your Lasso tool and draw a loop around babe including all the fluff. Cut and paste into the digital template.
- Reduce that layer opacity so you can run across the backdrop underneath
- Use the Transform tool to resize the baby to fit into the nest, wreath or bowl
- Once placed, increase the opacity back to 100% and add a layer mask (so CTRL I to invert-leaving a blackness layer mask)
- Utilize a white Brush tool at 100% to paint your bailiwick back in
- Now use the white or black Brush tool to blend dorsum areas of the edges if you need to brand more than adjustments to make realistic looking
- Add or reduce shadows using Dodge or Burn tool (or Curves layer if comfortable with this adjustment)
- Cease your image with any effects y'all normally utilise to your image to brand it yours & save equally a new file.
Source: https://www.newborndigitalbackdrops.com/digital-newborn-backdrop-instructions/
0 Response to "How to Add Baby Face to Digital Background"
Postar um comentário